Driving is more difficult than it first looks. There is more to it than just handling the vehicle’s controls and maneuvering the car in and around the roads. Some might tell you, “it’s as easy as A B C”. My take on that is that A B C is easy only for someone who has gone through a learning process. In other words, nothing is actually easy, until practiced.
Talking about driving, make no mistake, it is not as easy as it looks. You must have a number of times, sat on the front passenger seat while traveling on a short or long journey. What did you observe? You must have observed the driver sitting comfortably behind the wheel, maneuvering through corners, applying the brake, changing the gear, operating the sound system, selecting music of choice, even waving at a passer-by. It looks easy, doesn’t it? Until you have practiced and perfected the art or driving, it could be as difficult as a child learning to walk.
Reason being that driving a vehicle is more than accelerating and steering. While on motion, lots of quick decisions need to be made. That is why you need to go through learning stage properly, not trial by error, as many who learnt driving in Nigeria pre-FRSC era did.
In addition to accelerating, steering, changing the gear (in case of manual transmission), switching on and off the trafficators, headlamp or wiper(in case it starts to rain), clutching and braking, you have to simultaneously decide correctly who has right of way, when you reach a junction or roundabout.
You instinctively provide quick and correct answers to questions like these: “Can I turn left from this lane? Can I overtake? Has the traffic light allowed me to go through? Would a school kid or an elderly standing by the road walk across? Should I slow down? What’s that sound from underneath the car about? Do I need to pull up? Will this fuel take me to the nearest filling station? And more..and more.
Mind you, as you watch the road ahead, you also must not totally loose sight of signals on the dashboard. On the dashboard, you could receive a warning that the car is about to run out of fuel. There is another indicator on the dashboard that could tell you the car is running out of engine oil. If you fail to notice that for instance, your engine could pack up. There are still on the dashboard of modern day cars indicators to warn you that you might soon have flat tyre or your brake is about to develop problem or airbags are faulty and more. In essence, if all you learnt to do is mere ability to drive, you now know the implications.
Driving takes totality of your attention. And the more you practice, the more perfect you become. At the same time, you must look out for and manage unexpected hazards – such as other road users and changing weather conditions. (These are called perceptual or detection skills)
It takes a long time to put all these skills together and be a good driver. In fact, road safety experts advise that a learner needs at least 120 hours of driving practice to become a skilled driver. That sounds a lot. But it is not that difficult to build up to this number of hours. With your learner permit or provisional driving license(as is the case in the United kingdom), practicing two to three hours a week is achievable.
Note that it is illegal for a learner driver to drive or practice alone. So long as you have an experienced licensed driver by your side, could be a friend or relative, could even be a spouse, always ensure you are behind the wheel, even if it’s a short trip to school, work or sport centre. All can quickly add up to the required experience you need to become a proper licensed driver. The more experience you acquired during learning period, the safer you will be, when you are on your own!
So dear learner driver, welcome to Seven-week free driving lessons of Motoring World. Now that we’ve taking you through an overview of what you are to expect, we shall go into specifics. We shall begin by looking at various vehicle controls. Welcome to Lesson one of Motoring World’s Free driving lessons. I wish you happy leaning.
(B) Manual or Automatic Transmission
As you might be aware, a car (a word which originated from Carriage, drawn by horses in the days of old), is today made with either automatic or manual transmission. A car with manual transmission comes with three pedals and requires the driver to manually set or position its gear lever manually, an operation which requires pressing down the clutch pedal. Whereas an automatic car comes with only two pedals (lacks clutch pedal) and once the automatic gear lever is positioned on D(Drive mode), all other gear changing are done automatically, as the car’s speed increases.
Caution
Before we proceed, please note that a licensed motorist, who learnt and passed driving test using an automatic car is not legally allowed to drive a manual car. Whereas those who passed driving test with manual car are legally allowed to drive an automatic car. Notwithstanding, this lesson shall cover both automatic and manual vehicles.
(C) Learning To Drive An Automatic Vehicle
Now we are getting closer and deeper into the main business. But please do not try to jump the gun. Follow every step provided in this lesson so that you could at the end become one of the best and safest drivers on the road. First thing to do is get yourself familiar with pedals, transmission lever, various modes and controls. Now let’s go!
1. Open the driver’s door and seat behind the wheel
2. Find seat adjusters: Adjust the sitting to comfortable position. Seat adjusters are located on the left side and underneath the seat. seat can be adjusted forward and backwards as well as up and down.
3. Adjust Steering: If your car has got an adjustable steering, adjust the steering to a level that is most comfortable for you.
4. Get familiar With Foot Pedals: Look down below, where your feet are. You shall find two pedals. One by the left is for controlling braking. One on the right is for acceleration. The two pedals serve two different extreme purposes. While acceleration pedal revs and increases the speed of the vehicle, brake pedal slows down or bring the vehicle to stand still. Interestingly, unlike the case of a manual car, only one foot is required to control both pedals of an automatic car. And that is the right foot. Never try using both, except you are driving a manual car. Even that, only the right foot still controls the acceleration and brake pedals. It’s only clutch pedal, which is only available in a manual car that is controlled with left foot. Since an automatic car has got no clutch pedal, your left foot has no roll to play in driving an automatic car. Take not please.
5. Locate Parking Brake: Also important is parking brake or handbrake. It is a long lever with a button on its tip, usually located between the driver’s seat and front passenger’s seat. Handbrake is meant to lock the vehicle in placed after parking or if held up on a sloppy or hilly terrain. It is operated by upward pull while pressing in the button on its tip, and release the brake the same way, downward, when you are ready to move.
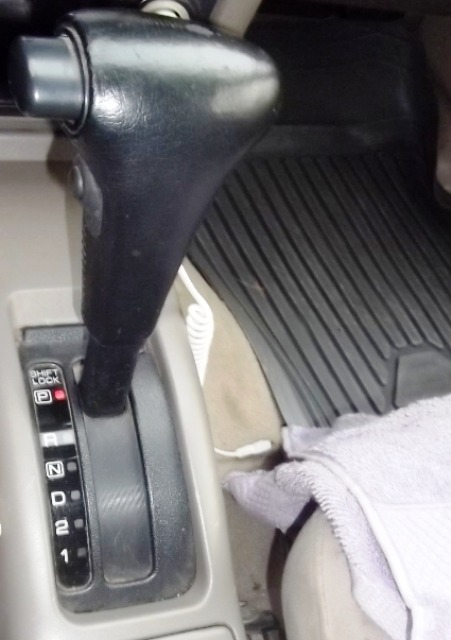
6. Locate The Shift Lever: Located between two front seats or as with the case of certain cars, some cars, positioned on the right side of the steering, a shift lever controls the gears of a vehicle. Check it out. You would find certain alphabets or numbers indicated along shifting routes of the lever. They are:
P (Park): Whenever gear lever is positioned at this point, vehicle is prevented from moving. Therefore, gear selector should be in this position
when the car is parked. In concurrence with this, parking brake (hand brake) should also be applied. Reason: If the car is a rear wheel drive, front wheel will still be free to move, especially if the car is parked on a sloppy terrain. Of course, if the car is four-wheel-drive, it can’t move. Nevertheless, the weight of the vehicle can stress the gear mechanism, thereby developing problems in future. That is why it is better to also apply the hand brake whenever your automatic gear lever is on P position. Also note that on most cars, engine would not start unless the lever is in either P(Park) or N(Neutral) position.
R(reverse): Positioning the lever at this point allows or commands the vehicle to move or be driven in backward direction
N(Neutral): This position disengages the gears(drive-train) completely from the engine, allowing the vehicle wheel to forward or backward at wheel, depending o the terrain you park on. If parked facing or backing a slope, the vehicle’s weight can help it to roll down hill against the driver’s will if the brake pedal is not pressed. Therefore, if your will is to park the vehicle for a while, it is advisable to put it on Park mode and also apply the hand brake.
D(Drive): This is forward movement position. It is the point that is typically used when the vehicle is being driven. As the vehicle increases (or decreases) in speed, the automatic gear box will select the correct gear for both speed and road conditions. Once the lever is positioned on drive mode, the vehicle automatically moves forward, unless the brake is applied. And as the driver accelerates, , various gears are automatically selected accordingly. How this works varies from car to car or model to model. Some cars now comes with up to five gears. Some even come with six, seven or eight. In 2013, Mercedes introduced nine-speed automatic gear.
[OD]-Overdrive: Certain automatic vehicles are equipped with Overdrive mode. What does it mean? It is a mode, which restricts the vehicle to driving on a particular gear without changing, as it would normally do. Remember, when you position the lever on “D” mode, the car accelerates automatically through all forward gears, depending on speed. Whereas Overdrive mode is a speed and gear changing restrictor. For vehicles fitted with this option, an extra gear is provided that has a lower ratio than the normal top gear. The power output delivered by this gear is low in comparison to the normal gears and is used for high speed cruising (on interstates / motorways etc). Engine revolutions are reduced, so are noise levels. Fuel consumption also improves.
[L] (Low gear or gear 1): Normally, automatic gear boxes of some vehicles gears L, 2 and 3 marked on the gear selector. By deliberate selection of “L” position, instead of “D”, locks the transmission in a lower gear so that the engine will run with increased revolutions. This is useful when rapid acceleration is desired. It is also used to increase breaking effect, when ascending or descending the hill. They are useful during winter season in cold regions of the world, like United kingdom. It should be noted, however, that maintaining high revolutions in lower gears will increase the fuel consumption of the vehicle and stresses the vehicle’s engine. It should, therefore, be used only when necessary.
[2 or S] – Second: This mode, which is available in certain Honda, Kia and Ford cars, also restricts the car’s transmission to second gear. Like “L” mode, it’s also useful for ascending or descending a slope and must also be used only when necessary.
[3] – Three: This mode also keeps vehicle’s transmission to third mode, also useful for ascending or descending a slope.
Manual Control: Certain modern automatic cars come with dual mode, that is automatic and manual. Applying this mode will enable a driver to do all gear changing manually.
(D) Other Controls
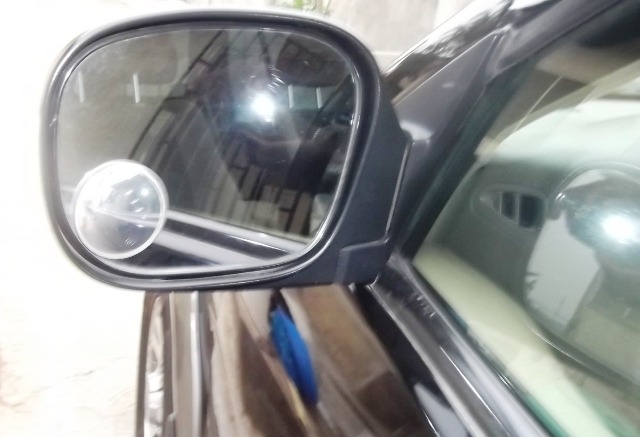
1. Mirrors are meant to assist a driver to sight moving or stationary objects from the rear. To avoid collision with an oncoming vehicle, side mirrors as well as inner mirror should be used to confirm whether or not it is safe to drive onto the highway or change from one lane to another. Inner mirrors enable the driver to see rear objects that cannot be seen through the side mirrors.
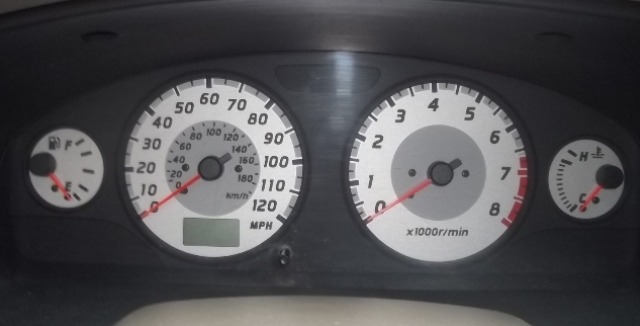
2. Dashboard Controls: Every vehicle has got a dashboard. They serve as information board, for they carry vital indicators, including the following:
Fuel Gauge or indicator shows how much fuel is left in the fuel tank.
Temperature gauge indicates how hot is the engine at every point. As you might be aware, overheating can lead to engine problem or even seizure. That is why the temperature gauge is on the dashboard to guide and warn a driver. The gauge usually indicates two extreme alphabets: “C”, meaning Cold and “H”, meaning hot. If all is well with a car engine, temperature indicator needle should normally stay in the middle, no matter how far the car travels. In future, we shall delve deeper into overheating, causes, prevention and remedy. Just ensure you never miss any edition of Motoring World online or get yourself a copy of Motoring Digest by Femi Owoeye.
Speedometer, also known as odometer, is about the most popular of all controls on the dashboard. It indicates the speed at which your vehicle travels. This is measured at Miles per hour(MPH) or Kilometres per hour(KMPH/Km/h.
Tachometer Gauge shows the rate at which your engine is spinning or rotating. It is normally measured as Revolutions Per Minute(RPM). Normally the numbers on the tachometer gauge stand for 100 RPM. For instance 25 actually shows 2,500 RPM. A lower RPM on the tachometer gauge, shows the engine is turning slowly. When an engine revolves at lowest RPM, it is known as idle speed. This will usually be between 500 and 800 RPM.
It is also normal for the engine RPM to indicate a higher idle speed, when the engine is first started or when the engine is cold. The higher RPM allows for a faster engine warm-up and keeps the vehicle from stalling when cold. When the engine reaches full temperature, the idle speed should return to its normal range. An engine RPM lower or higher than normal indicates a problem. On later model vehicles, this will also cause the check-engine light to come on.
Tachometer gauge also serves as a diagnostic tool. The relationship of RPM to vehicle speed, shown on the speedometer gauge is very important. For instance, when driving, as the RPM increases on our gauge, vehicle speed should also show an increase on our speedometer gauge. If the engine RPM rise without accelerating, we may have a transmission problem. Paying close attention to our tachometer gauge may easily prevent a transmission failure.
For better fuel mileage we need to keep the engine RPM as low as possible. Accelerating slowly will help keep engine RPM down and fuel mileage up. Our engine computer learns the way we drive. When we accelerate slowly, it causes the transmission to shift at a lower RPM. Accelerating slowly will greatly increase fuel mileage. Driving at a slower speed also reduces the engine speed and increases our fuel mileage.
Light Controls: As a learner, note that driving a vehicle also includes operating the signals or trafficators located on the front, rear or, in certain cases, sides of a vehicle. In case you need to make left or right turn or desire to change from one lane to another, the blinkers or indicators are what you use to warn or inform fellow road users of your intention. Therefore, when indicators on the left or right side of your vehicle flashes, fellow road users would assume you are about to turn to either right or left, depending on which side flashes.
The foregoing indicators are controlled by a stalk located on either right or left side of the steering, depending on manufacturer.
While in the right hand drive vehicles, indicator stalk can be located on either right or left side of the steering, depending on auto maker, it is commonly located on the left side of the steering in all left hand drive vehicles.
How do you activate the indicators? You do that by lifting or lowering the stalk or lever. Lifting up the stalk will activate trafficator lights on the right, indicating that you intend to turn to the right or change to right lane. Lowering the stalk will set the left indicator lights flashing, telling road users your car is about to turn left or change to left lane.
In the modern vehicles, controls for switching on headlamps or activating high beam is also added to the indicator stalk, which is operated by twisting the stalk either clockwise or anti-clockwise, depending on which side of the steering the stalk is positioned. However, in certain modern cars, headlamps are switched on by mere tapping of a button.
Wiper Control: Also located on either right or left side of the steering column (depending on manufacturer) is a stalk for activating the windscreen wipers as well as rear wipers.
Study the car you are about to learn with and find out location of all essential controls discussed in this lesson. When it rains, you will need to activate the wipers, control of which varies in speed. That is the control stalk can be positioned to either make the wipers wipe faster or slower, depending on intensity of the rain. The same stalk is also used for washing a dirty windscreen to get a clearer view, which is essential for safe motoring.
This is how far we shall go in this edition of Driving Lessons. Lesson 2 will lead you through the process of moving an automatic car. You shall find the pedals, use your seat belt, start the engine and experience the fun of driving a car. Don’t miss it. Until next week when you shall be served another illuminating edition of driving lessons in Motoring World, please be careful out there.


